Challah Braiding
Beth LeeChallah braiding is so much easier than you think. From a 3-strand to a 4-strand to a 6-strand braid to a knotted roll and a braided single strand, you’ll be an expert in no time. Post includes visual and written instructions.
Ingredients
- favorite challah dough recipe Challah Dough Recipe
- flour for dusting
- seeds for decorating
- 1 large egg + 1 teaspoon water for egg wash
Instructions
3-strand challah braid
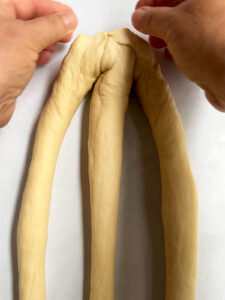
- First, connect the dough strands together at the top end. Then spread the strands apart.
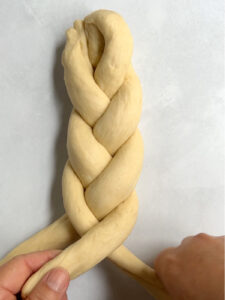
- Like braiding hair, place the right strand over the middle, then the left over middle (or vice versa). Doesn’t matter which side you start on. As the outside strand moves over the middle, you’ll notice that you are creating a new middle!
- Just continue on down until you run out of strand and press the ends together and fold them under.
4-strand challah braid
- As with the 3-strand challah braid, connect the strands together at the top.
- Starting on the right or left, bring the second one UP and over the 2 strands to its left and bring the first strand OVER the strand that is now adjacent to it. If it helps, count 1,2 on each side to remind yourself which strands to use next.
- Just keep repeating in your head: 2 UP, 1 OVER until you reach the end of the strands; then press the last bit of dough together and fold it under.
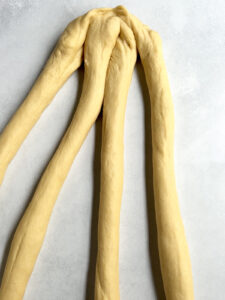
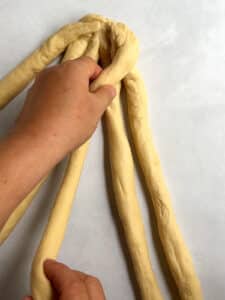
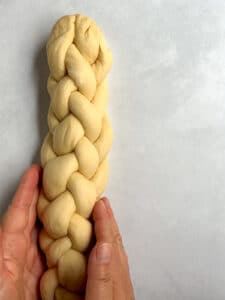
6-strand challah braid
- As with the 3- and 4-strand challah braid, connect the strands together at the top.
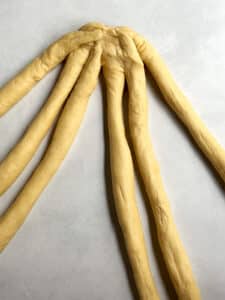
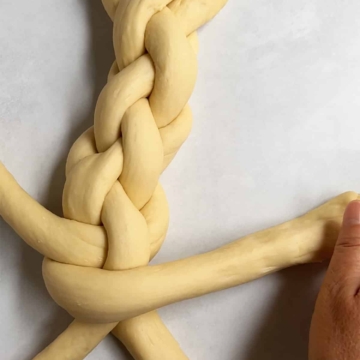
- Like a 4-strand, I think about only two strands at a time. As always, separate out your strands with breathing room between them all. Then starting on either side, pick up the outside strand and lay it over the two adjacent to it. As Joan taught me, this is "outside over 2".
- Then take the strand that is next to the last strand on the other side of the challah and bring it up and over all the strands. This is what Joan and I call "next to the last to the outside". Sing these two phrases over and over again until you make it all the way down the challah.

- Just keep repeating in your head: "outside over 2" and "next to the last to the outside" going back and forth as you do this. When there is no more dough to work with, press the last bit of dough together and fold it under.
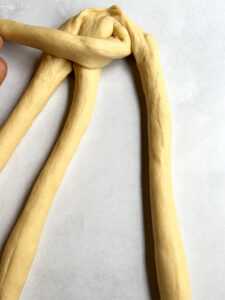
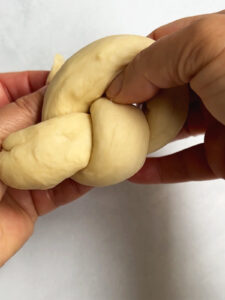
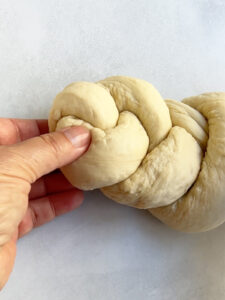
Knotted challah roll
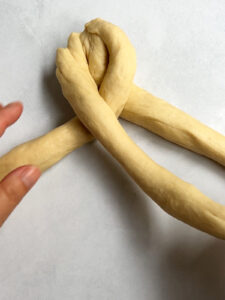
- Form a ribbon shape by folding your challah strand in half and placing the right end over the left.

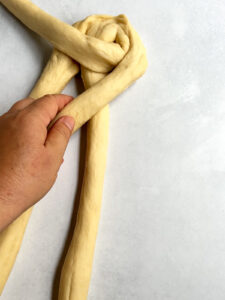
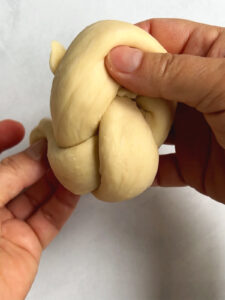
- Then grab the end that is underneath and bring it up and through the center hole.
- Next, take the other lonely end and connect it to the end that just went through the center. You now have a knotted challah roll.
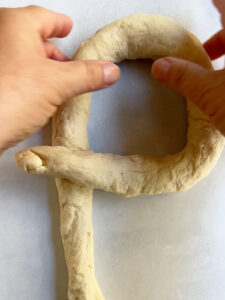
Single strand challah braid (or knot)
- Form a p-shape from the single strand.
- Then grab the leg of the "p" and bring it up and into the circle of the "p", pulling it toward the left as you do.
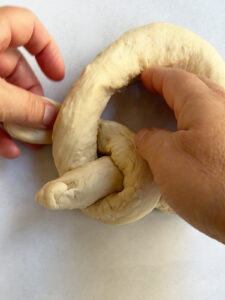
- Twist the circle of the "p" to create a smaller circle
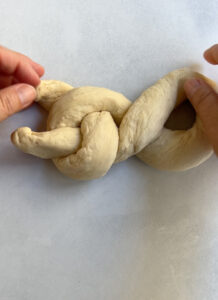
- Now grab the leg strand you previously brought up and under and pull it over to the right into that new smaller circle you just created!
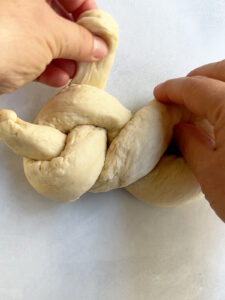
- Finally affix the piece of the dough on the left underneath and you have a mini loaf of "braided" challah dough (kind of an elaborate knot).
Notes
- Sometimes I need a bit of flour for dusting when rolling out the strands and sometimes I don't. If the dough is still a bit sticky, use some flour. If the dough isn't sticky, you will get the best "traction" for rolling out strands on a flour-free surface.
- When rolling out strands, if the dough is springing back and not remaining at the length you would like, just let it rest. The gluten sometimes really does need a break. Set that piece aside for a couple minutes and come back to it. Really.
- Another rolling out tip - use the palms of your hands and work from the inside out. Some people like the ends of the strand to be tapered thinner. That works or just go for a relatively even thickness throughout the strand. Precision is not necessary.
Tried this recipe?Let us know how it was!