

Round challah is the perfect shape for celebrating the Jewish New Year (Rosh Hashanah). Using my dear friend Lonni's tried and true traditional challah recipe, you'll be baking your own round challahs with confidence all year round.
You might also like my easy almost no-rise challah recipe.
For ease of browsing, find all my Rosh Hashanah recipes in one place.

This post contains Amazon affiliate links. As an Amazon Influencer, I earn from qualifying purchases. Your price is never affected.
Why you'll love this recipe
We bake challah all year long for Shabbat but for the Jewish New Year (Rosh Hashanah), we make round challahs to represent the circle of life.
With Lonni's challah recipe, you'll get a delicious loaf of bread infused with all the love and meaning a loaf of challah represents.
As an experienced, confident challah baker. Lonni's verbal and visual instructions will make you feel like she's in the kitchen with you. (watch the video to see her make a coiled round challah so beautifully)
This recipe makes a good amount of dough and yet is very manageable. It is so versatile - you can make two large round loaves or several smaller ones or one braided loaf and two medium size round challahs or any combination that works for you.


What I learned watching Lonni make challah
- You have to get your hands dirty to learn to make bread: I arrived at Lonni's kitchen armed with all the right recording devices to document her prowess. But baking is not a spectator sport. You have to get in on the action. Feel the dough’s elasticity, moisture, texture and see its color, size, and shape.
- Breadmaking is both a science and an art: If it’s a hot day, the dough might rise faster. If it’s a moist day, perhaps you’ll need more flour or less water. The recipe is the starting point; your senses are the tools that make the recipe become bread.
- You don't need fancy equipment to make great bread: My grandma (Annie) kneaded and shaped her challah dough in her postage-stamp Brooklyn kitchen until her early 90s. Lonni kneads her dough by hand even though she has a big kitchen and a stand mixer. She considers kneading a form of therapy and exercise and loves to feel the dough transform from individual ingredients to a perfect smooth ball of challah dough.
- Making challah is making memories: As I watched Lonni vigorously knead her challah dough, I remembered as a young girl how I loved to watch my grandmother bake and I especially loved her workmanlike hands preparing the challah dough. Unlike my grandmother Annie’s thick, short fingers, Lonni’s hands are nimble and athletic, just like the rest of her tiny but powerful body.


Ingredients you'll need
As with most breads, the resulting loaf is so much more magical than the relatively simple ingredient list.

- All-purpose flour: Lonni uses all-purpose flour but you could use bread flour or a combination of bread and all-purpose. Remember bread flour has a higher protein content and will give your bread a tad more structure. Or you might notice you need a touch extra water. That's ok - use your instincts and don't be afraid of substituting one for the other.
- Warm water: It's best to use water between 105° and 115°. It helps to activate the yeast.
- Yeast: I recommend either the standard packets of Red Star or Fleischmann's active dry yeast or SAF instant yeast.
- Eggs: I use large eggs and Lonni says you can use anywhere from 2 to 4 eggs in this recipe. More eggs may slow down the rise a bit but will also encourage a higher overall rise, a tender crumb and a nice brown exterior.
- Vegetable oil: Canola oil or olive oil can also work here.
How to make this recipe
You can knead this dough by hand or with a stand mixer or a combination. Lonni says: "It takes me about 20 minutes to knead the dough by hand. I used to do it in the mixer, but I really like to feel the dough and put my heart (and muscle) into the process of kneading it myself!"
1. If your yeast is alive (not way out of date), then you can add active dry yeast or instant yeast (whichever you are using) directly to your flour mixture without proofing it first (really - it's true - I talk about this in my book and tested it many times). However, if you have any concern that your yeast is expired, then proof it. Just add it to the warm water needed for the dough along with a tablespoon of the sugar and make sure it foams.

2. In a large bowl, add all the other ingredients, then add the water/yeast mixture.

3. Knead until smooth and shiny and springy.

Note: I decided to knead this dough most of the way in the stand mixer and then finish it by hand just to test that option for you. This dough looks a bit too sticky here but that was on purpose - I wanted to be able to use plenty of flour to finish the kneading on the counter. I could just have easily added some flour to the stand mixer and proceeded with the dough hook.
4. This is the dough ready to be kneaded on my kitchen counter.

5. Even if you do all the kneading in the stand mixer, it's nice to place the dough on the counter and knead it a few times just to check the texture and confirm it's ready to rise.
Email this recipe to me!

6. Cover and let rise until about doubled in size. The time varies by the weather. Lonni says (and I agree!) that you can also prepare the dough the night before and let rise in the fridge overnight.


7.Turn the dough out onto the counter and divide in half. Braid, or shape as you wish then place on a parchment-lined sheet tray. (see recipe and video for instructions for two different methods of making round challah)

8. Preheat oven to 375. Egg wash the loaves and add seeds if using.

9. Lower oven temperature to 350°F. Bake for 25-30 minutes until golden and the loaf sounds hollow when thumped. Remove immediately to a wire rack so the loaves don’t get soggy on the bottom.

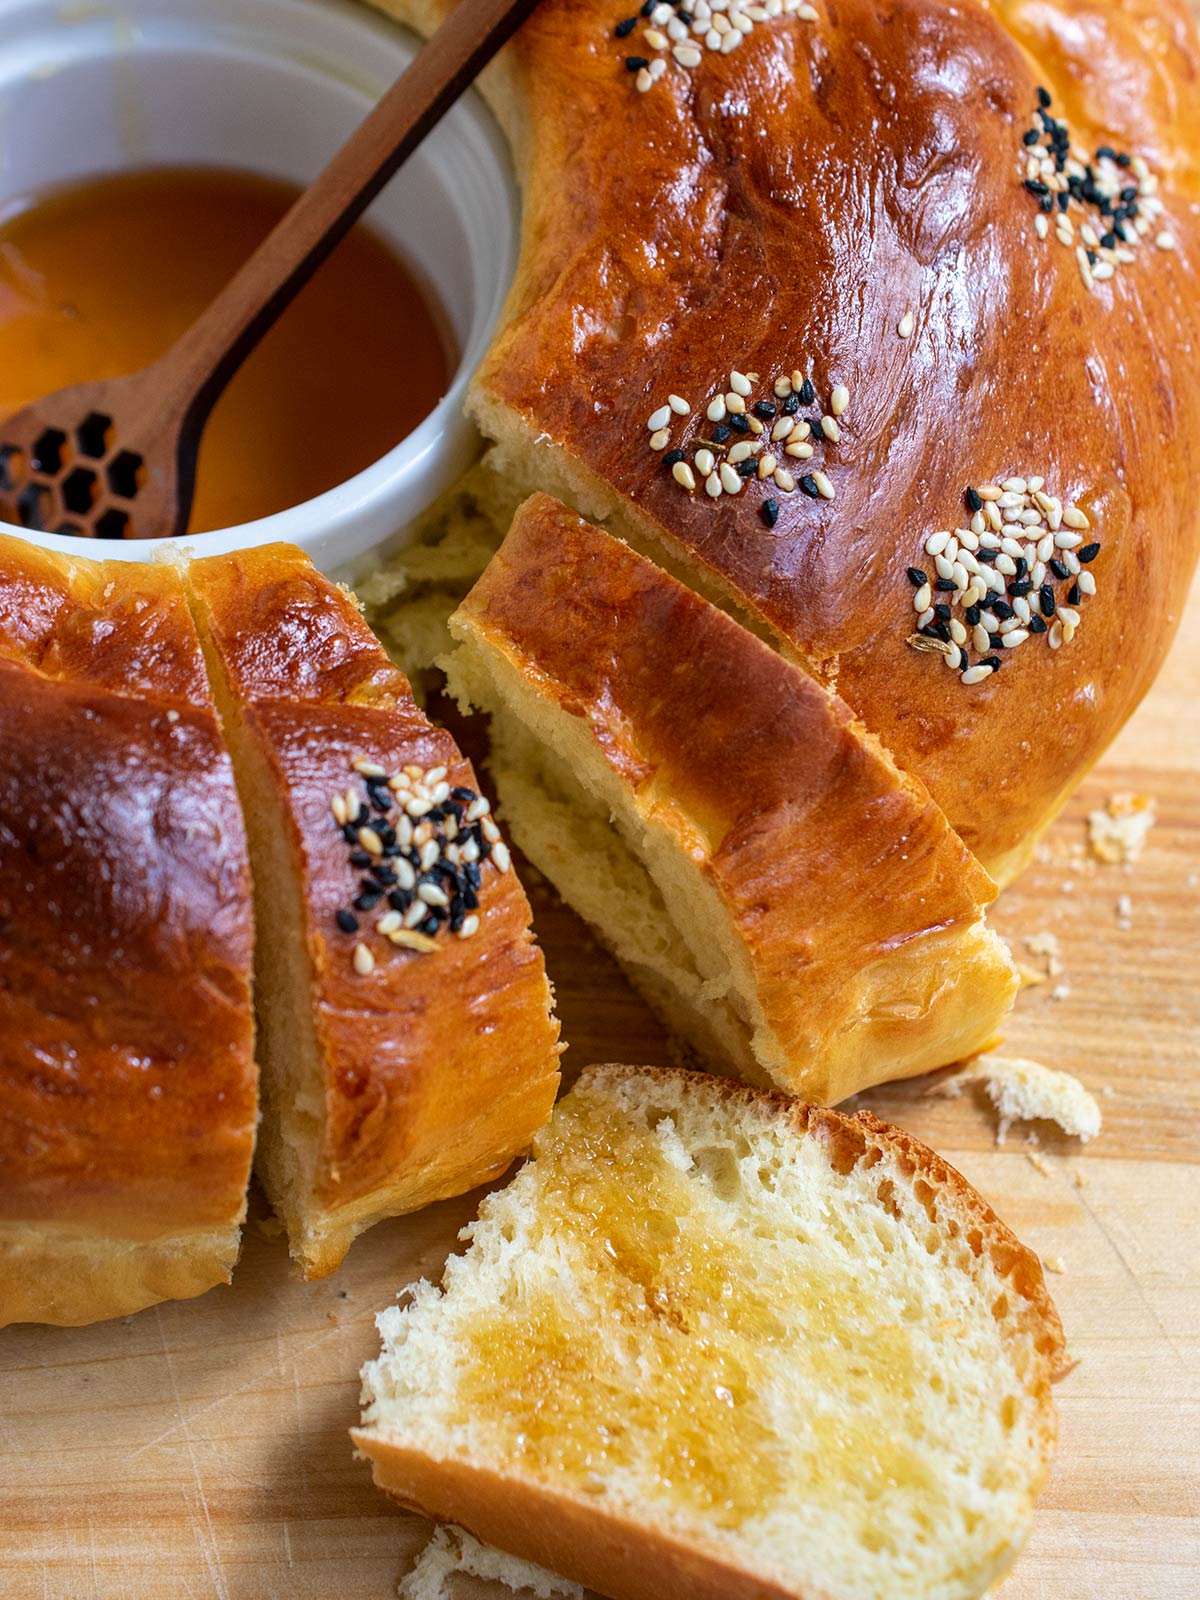
10. Serve with honey or your topping of choice in the center ramekin.

Expert Tips and FAQs
- Even if you have a stand mixer and dough hook, try, as Lonni does, to knead the dough by hand from start to finish at least one time. It will really help you learn about how dough forms and what it should look like and feel like when it's ready to rise.
- The recipe card below will give you approximate rise times but remember, the climate of your home, the outside temperature, the location in your kitchen where the dough rises, even how many eggs you use will all affect how quickly your dough rises both the first and second time. So use visual cues as well as rise times to decide when your rise is done.
- Lonni sometimes makes the dough the night before and let's it rise slowly in the refrigerator overnight.
We eat round challahs traditionally for the Jewish New Year or Rosh Hashanah. They symbolize the circle of life and the hope that our new year continues to give us sweetness and blessings without interruption. It is also thought to symbolize a crown for G_d. For even more details, check out this deep dive into round challah meaning on the Chabad site.
We dip apples in honey and serve honey with our challah to symbolize the hope for a sweet new year. Sometimes we also add raisins, apples, and cinnamon sugar to our Rosh Hashanah challahs to further remind us of this sweetness.
Absolutely. If you happen to have any leftover or you make some extra loaves ahead of the holiday, wrap airtight and freeze. A quick reheat in the oven once defrosted should bring it back to its original state of deliciousness.
There are many, many ways to make a round challah. The recipe below covers two methods - coiling and taking a standard braided loaf and forming it into a circle. You can also start with a cross hatch of 4 strands to end up with a solid (no whole in the center) round loaf. Or place small roll-size challah pieces in a round baking pan (almost like when you make cinnamon rolls).
More challah recipes on OMG! Yummy:
Challah Rolls with Apple Currant Filling

Easy Challah Recipe with a Hint of Citrus


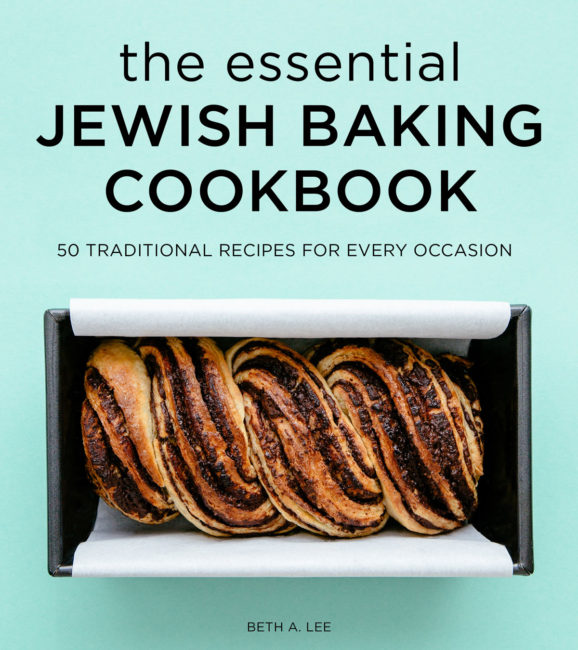
Buy my cookbook now!
P.S. If you try this recipe, please leave a star rating and/or a review in the comment section below. I so appreciate your feedback! AND find more inspiration on Pinterest, Facebook or Instagram. Signup for my email list, too!

Round Challah for Rosh Hashanah
Beth LeeIngredients
- 1 tablespoon active dry or instant yeast
- 1 ½ cups warm water between 105°F and 115°F
- ⅓ - ½ cup sugar
- 6 cups flour she uses regular flour, not bread flour
- 1-2 teaspoons salt
- 2 - 4 eggs she usually adds 4 eggs, I used 3
- ⅓ cup oil vegetable or canola
Egg Wash
- 1 egg
- 1 teaspoon water
Instructions
Prepare dough
- Add 1 tablespoon of the sugar to the warm water, then add the yeast. The yeast will bubble up in a minute or so, (if it doesn't then the yeast is no good)
- In a large bowl or the bowl of a stand mixer fitted with a dough hook, add the flour, salt, eggs, oil and balance of the sugar. Then add the water/yeast proofing mixture.
- If kneading by hand, you can start with a wooden spoon or just dig your hands in and combine. When it starts coming together in the bowl, transfer it to the counter to continue the kneading. It takes Lonni about 20 minutes to knead the dough by hand. She used to do it in the mixer, but really likes to feel the dough and put her heart (and muscle) into the process. Knead until smooth and shiny and springy.
- If using the stand mixer, start on medium low to combine the ingredients, then turn it up to about medium. At about 5 minutes, scrape down the sides and let it continue to knead for another 3 minutes or so. Check with your finger to see if it's tacky or downright sticky or too dry. Tacky but not wet is perfect. I like to take it out of the stand mixer and finish the last bit of kneading by hand just to get a feel for the dough. Do this on a lightly floured surface and flour the dough if it is still sticky.
First rise and shape
- Place the dough back in the large bowl, cover and let rise until double in size. The time varies by the weather. Lonni says you can also do this the night before and let rise in the fridge overnight.
- Once doubled in size, turn the dough out onto the counter and divide in half. Braid, or shape as you wish. Lonni likes to add cinnamon and sugar to the middle of her dough strands.
- To make a strand of any length for braiding or coiling, form a piece of dough into a cylinder then roll it out with the palms of your hands to the length you want. If it’s uneven, just squish it with your hands to even it out a bit. Remember, it doesn’t have to be perfect.
To make a round challah
- Coil Method: Take any length strand (for a fairly large round loaf try 24") and loosely coil it up and connect the end underneath (see video of Lonni doing this).
- Round challah with ramekin: Braid half the dough into a 3- or 4-strand challah. Grease the outside of an ovenproof ramekin. Place the ramekin on your parchment-lined baking sheet and encircle the ramekin with the braided dough. Connect the ends of the dough together. Not to worry if the connected part isn’t as perfect as the rest of the braid. It will all look beautiful after it rises and bakes. (see video)
Final rise
- Preheat oven to 375°F.
- Place prepared loaves on a lightly oiled baking sheet, silicone mat or parchment-lined baking sheet. Let rise approximately 1 hour in a warm place. Lonni says it is important not to let the second rise go much longer than an hour. After that the yeast begins to die and your challah will be flat and taste "yeasty". Check periodically - you are looking for about a 30% increase in size and the dough should spring back slowly when you poke it.
Egg wash and bake
- Whisk the egg and teaspoon of water and brush the loaves with the egg wash.
- Turn oven down to 350 and bake for 25-30 minutes until golden and the loaf sounds hollow when thumped. If you have an instant-read thermometer, they should register between 190° and 200° F when done.
- Remove immediately to a wire rack so the loaves don't get soggy on the bottom. Resist cutting them until they cool down.
Video
Notes
- Even if you have a stand mixer and dough hook, try, as Lonni does, to knead the dough by hand from start to finish at least one time. It will really help you learn about how dough forms and what it should look like and feel like when it's ready to rise.
- The recipe card below will give you approximate rise times but remember, the climate of your home, the outside temperature, the location in your kitchen where the dough rises, even how many eggs you use will all affect how quickly your dough rises both the first and second time. So use visual cues as well as rise times to decide when your rise is done.
- Lonni sometimes makes the dough the night before and let's it rise slowly in the refrigerator overnight.
Nutrition
Enjoyed this post?
Sign up for my email list.


jeani miner says
I am not a baker by any means, but my dearest friend asked me to bring two loaves of challah for Rosh Hashanah this year. Rather than go to the local bakery, I decided to make them. After a scour of the internet I landed here and I'm so glad I did. I make two rounds, one a simple braid wrapped around a ramekin (for honey) and the other the four-strand round. So exciting to watch them rise and then cook!
The loaves were absolute perfection. Lofty, tender crumb, golden brown, (no soggy bottoms thanks to the tip of placing on a wire rack immediately), and oh, so delicious. Everyone commented on how beautiful the bread texture was and how great the flavor was.
I will be making this again for our own enjoyment and of course again for the new year. Thank you so much for such a detailed recipe - success was guaranteed!
Beth Lee says
Dear Jeani - How kind of you to take the time to share this feedback with me. Certainly a sweet moment for me to start the year. I do what I do for you to have just this experience. So so happy you found success and want to bake again and again. Shana Tova to you and your family and friends.
Marlene Lara says
Too many ads on this site, makes it difficult to navigate. Trying your recipe tomorrow though. Thanks
Beth Lee says
The ads keep me in business so I can continue to bring everyone the content they enjoy. Hope your challah came out great and if you celebrate, that you had/are having a sweet new year! Appreciate your support, readership and feedback always.