

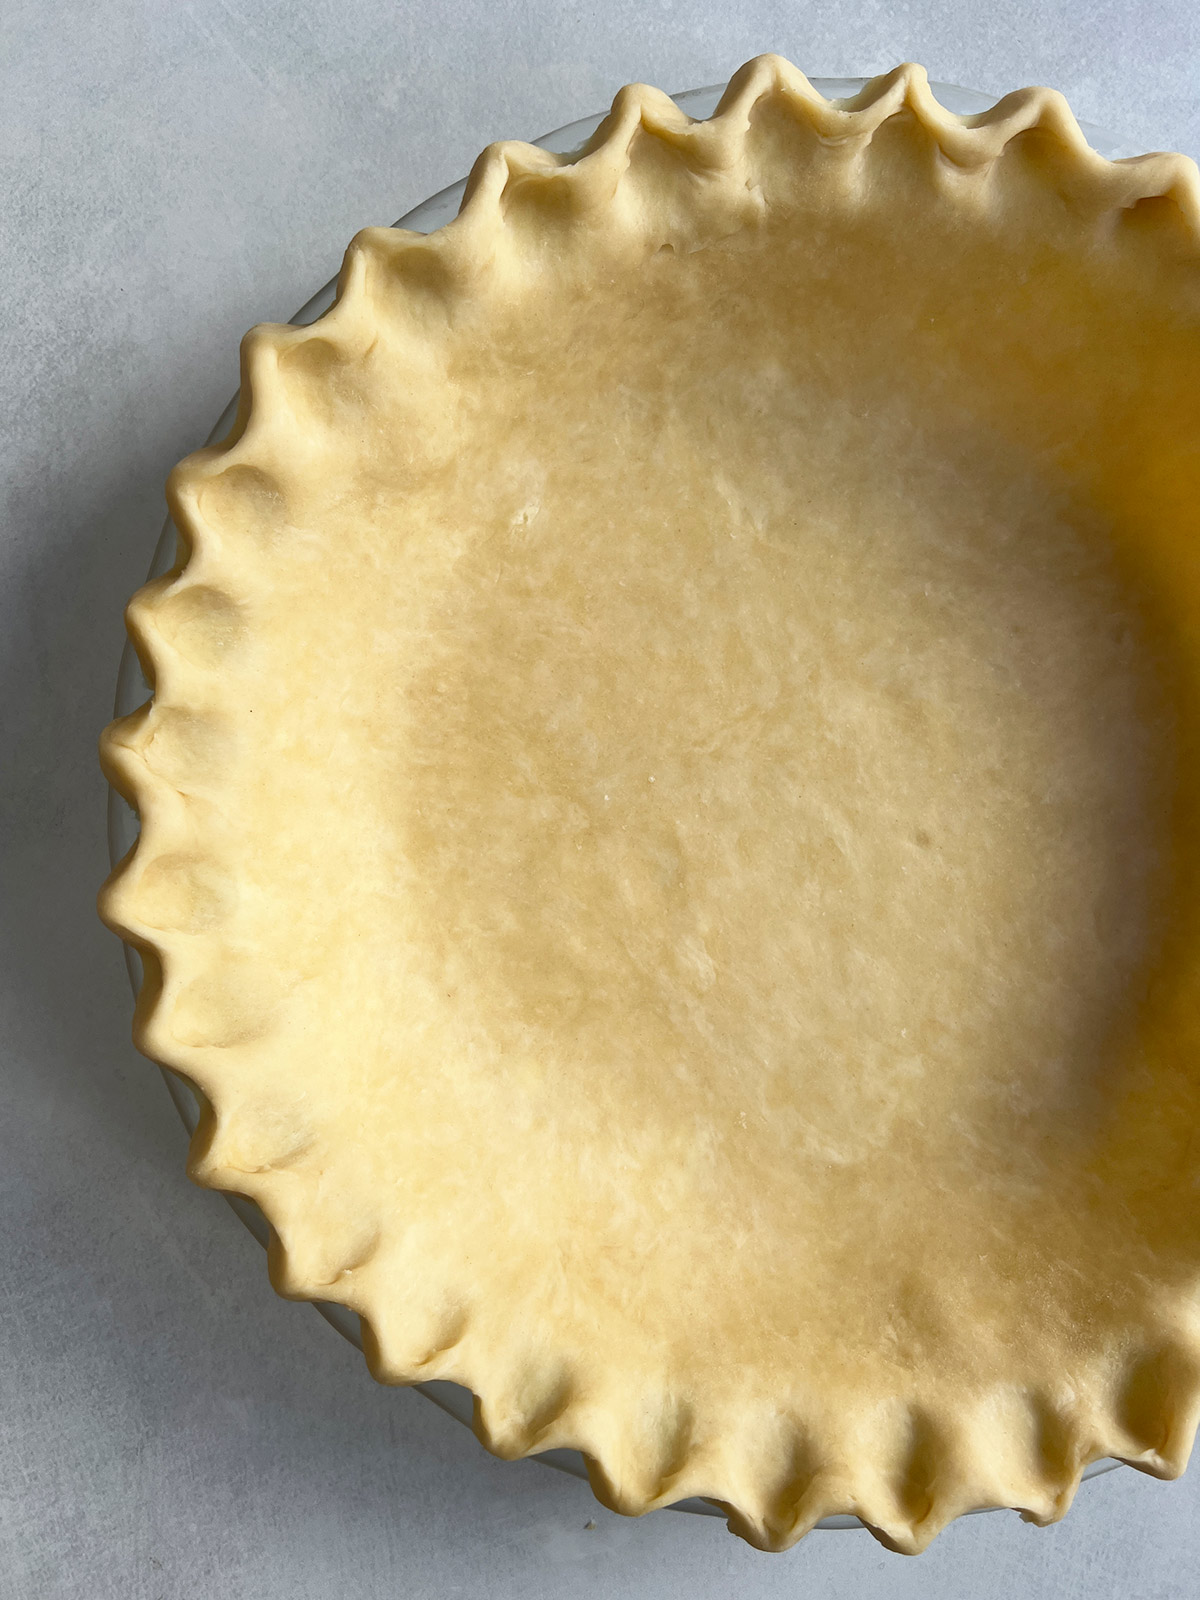
Homemade refrigerated pie crust -- learn how to make your own pie crusts, refrigerate or freeze the dough, and you'll be ready to make pie anytime!
For ease of browsing, find all of my baking and dessert recipes in one place.
This post contains Amazon affiliate links. As an Amazon Influencer, I earn from qualifying purchases. Your price is never affected.
Acrophobia, claustrophobia, doughaphobia. Until I started writing this blog in 2010, I was definitely doughaphobic. If there was yeast, butter or a rolling pin involved, I froze up. With the help of a food friend and my very own dormant chef, I faced the pie dough and did not let it crumble me.
Keep reading and I promise you too can learn to make homemade refrigerated pie crust with great success and no fear involved!
Why you'll love this post and recipe
Do you cringe at the thought of making your own pie crusts? Do you run for the frozen aisle to grab pre-made pie dough or dial the emergency Marie Callender’s 911PIE number? If you do this out of fear and not necessity, then this post is for you!
I include my top tips for pie dough novices and those suffering from an acute case of doughaphobia. If you have been asked to bake pies for a holiday dinner, such as Thanksgiving, and haven’t slept since the request came in, read this post.
For those of you who are pie crust experts already, please just head straight to the comments section and leave us your favorite tip or words of encouragement. We will appreciate your experience and support!
Ingredients you'll need
You only need 5 ingredients to make pie dough: flour, butter, salt, sugar and ice water. If you are planning to use the pie crusts for a savory recipe such as turkey pot pie, you can reduce or leave the sugar out.

- All-purpose flour: I use either Gold Medal or King Arthur's all-purpose unbleached flour. I have not experimented with any other kind of flour ... yet.
- Unsalted butter: I use whatever brand is the most affordable, generally, to be honest! The key with the butter is for it to be cubed and cold.
- Sugar: I just use standard granulated white sugar.
- Kosher salt: I use Diamond Crystal Kosher Salt for all of my recipe testing. If you use Morton's Kosher Salt, the guideline is to use about ½.
How to make pie dough
I use my stand mixer to make my dough BUT you can use your food processor or your hands or a manual pastry blender device that many of us remember from our childhood. Do not let your equipment or possible lack thereof stop you!
In fact, many experienced bakers would tell you to start with your hands so you can feel how the butter and flour come together to create the marvel that is pie dough!
1. Prep your ingredients - I like to start by cubing the butter and refrigerating it. It's crucial that you add it to the flour when it is chilled.

2. Mix the dry ingredients together - the flour, salt and sugar.

3. Add the butter cubes to the flour mixture and continue to let the paddle attachment work its magic (if you are using the stand mixer). The flour and butter will begin to mesh together and you'll see varying pea sized pieces of flour and butter emerge.

4. Add ice water starting with the least amount in the recipe. Put a pinch of dough between your fingers and feel the texture. If it's still sandy or not staying together, add more water a tablespoon at a time.

5. Once it comes together, remove it to a clean surface (I use parchment), divide the dough in two, roughly form two disks. Wrap and refrigerate.

Check out my pie crust web story for a quick visual overview of this recipe.
Email this recipe to me!
Expert Tips and FAQs
Here are my best tips I learned over the years while preparing homemade refrigerated pie crusts.
1. Cut up butter ahead of time and put in fridge so it’s ready to go. Using chopsticks to put the butter in the mixer works great if you know how to use them.

2. Have ice water ready before you start preparing the pie crust.
3. If using a stand mixer to make your pie dough, watch closely once you put the butter in. The transformation into pea-sized pieces happens all of a sudden - you will hear a change in the sound of the mixer as the transformation is about to happen. So stand by the mixer and watch and listen!

4. Once you add the ice water, the dough comes together quickly - as quick as 10 seconds.

5. When you form the dough into two disks after it comes together, don't work the dough. Just divide the dough, roughly form two disks, wrap and refrigerate. No need for perfection here.

6.The depth and diameter of your pie plate matter. Always note what size pie dish the recipe you are using calls for. Cheryl told me to get standard depth (about 1.25") 9" diameter glass pie plates. At the time, I couldn't find them anywhere. I have 9.5" diameter pie plates that are closer to 2" deep. So I need more dough and filling if I'm making 2 pumpkin pies. Measure what you have so you won't be surprised that you have too little or too much pie crust dough!
Now for the Frequently Asked Questions! Professionally-trained chef, cookbook author and friend, Cheryl Sternman Rule answered so many questions for me when I learned to make pie crust. Here are the invaluable answers she shared with me:
Absolutely! You can even make them the weekend before, roll the crust out, line the pie plate (she recommends 9-inch glass), then wrap it in a double layer of plastic/foil and freeze the whole crust/plate combo. You could add a piece of parchment on the dough so the foil doesn’t stick.
Remove the frozen pie crusts from the freezer the night before and put the whole thing in the refrigerator to temper the glass so you’re not putting a rock-solid frozen pie crust and plate directly into a hot oven.
OR, just make the dough a day or two or three before, refrigerate it, and roll out and bake it the day you need the pies.
The actual temperature of your refrigerator and your home will affect how long you need to leave the dough at room temperature before it's malleable enough to roll out. I would start with 5-minute increments.
If it's just a bit too hard and you are in a rush, Cheryl said to whack it with your rolling pin. I've never had to do that (though it does sound fun!). Just use your warm hands to begin to flatten the dough and that will likely move it right along to a softer state.
Cheryl added: "I'm guessing the whacking compresses the layers in a way that's not optimal, but I figure, hey, I'm rolling it out anyway, how much additional harm could I really inflict?"
Many pie crusts do have to be “blind-baked” or par-baked before the filling is added. Every recipe should instruct whether you should pre-bake or not. I keep a bag of beans that I use over and over for when I do need to blind bake a crust. Line the crust with parchment paper and then pour the beans in to weigh down the crust so it doesn't expand. Many pumpkin pies call for pre-baking and many do not.
Cheryl suggested if not blind baking the crust, bake the pie on the bottom rack of the oven and the glass pie plate ensures thorough baking, too. Always check the pie about 15 minutes before it’s scheduled to come out, and cover the edges with a little foil if they’re getting too dark.
Roll out your dough on a very well-floured countertop or board, then use a pastry brush to lightly brush off excess flour before you place the refrigerated pie crust in the pie dish.
Invest in a bench scraper if you don’t have one. They’re cheap. It will help you move your dough around or cut your dough in half, etc. A pastry brush is handy and of course a rolling pin and pie plates!
Recipes using homemade refrigerated pie crusts
Want to make a non-traditional nut-crusted pie? Try this key lime pie!
Buy my cookbook now!
P.S. If you try this recipe, please leave a star rating and/or a review in the comment section below. I so appreciate your feedback! AND find more inspiration on Pinterest, Facebook or Instagram. Signup for my email list, too!

Homemade Refrigerated Pie Crust
Beth LeeIngredients
- 2.5 cups all purpose flour
- 1.5 tablespoons granulated sugar
- ¼ teaspoon kosher salt
- 20 tablespoons cold unsalted butter cut into cubes
- 3.5 to 4.5 tablespoons ice water
- flour for dusting
Instructions
- Prepare your butter by cubing it into about ½-inch size pieces and keep this refrigerated. This can certainly be done ahead of time and be waiting in the refrigerator for your next steps.

- Using your stand mixer fitted with the paddle attachment, place the flour, sugar, and salt in the bowl and mix it together briefly on low speed to combine.
- Add the cubes of butter to the bowl of the stand mixer.
- On low speed, mix the flour and butter together until they resemble small uneven size peas. If you listen while the mixer is working, you will hear it change tone as the butter becomes incorporated into the flour.
- At small pea stage, add in 3.5 tablespoons of the ice water and mix for 10 more seconds. Then take a small bit in your fingers and squish it. Does it hold together? Then you probably added enough water. Is it a bit crumbly? Add in another tablespoon of the ice water.
- Once the dough has formed, remove it to a lightly floured surface or parchment paper. Split it in two, wrap each piece separately. Weigh them out to be precise if you’d like. Wrap well and place in the refrigerator to rest for at least an hour before you roll them out. Even better leave them overnight or for as long as 3 days. If you need to wait longer, then freeze them and they will last for at least a month.


Video
Nutrition

Enjoyed this post?
Sign up for my email list.


Laura Bashar says
I used your pie crust recipe for my Thanksgiving pies this year. One recipe was enough for a big 9-inch cherry pie with lattice top. I froze the dough a week before baking and everything turned out flakey and perfect. Thank you, Beth!
Beth Lee says
So smart to make it ahead. I saw a pic of your pies on Instagram - wow - your lattice and crust work were spectacular! Thanks for letting me know how they came out!